- Updated: February 1, 2023
How To Clean Golf Clubs
Improper club cleaning and grip maintenance cost so many golfers unnecessary strokes and subsequent headaches on the golf course.
As the games “playing population” continues to grow, golf clubs’ prices have been steadily increasing, making equipment investments by golfers even more substantial than in previous generations.
On top of helping your equipment perform its best, keeping your golf clubs clean helps them last longer, retain much greater resale value for the future, and ultimately leads to lower scores for players.

A Quick Note About the "Club Cleaning Process" Before We Get Started...

We believe “cleaning your golf clubs” should be considered a two or even sometimes three-step process to achieve the greatest results.
When you’re on the golf course and taking divots, mud, grass, sand, and other natural debris are getting on your club face and between all the nooks and crannies of your club head.
The first step in maintaining clean clubs involves regular cleaning done by the golfer while playing.
Step 1: Routine Club Head Cleaning While On the Golf Course
After and before each swing, players should inspect their club heads thoroughly. Dirty grooves or remaining dirt on the club heads impacts the performance of the club itself, making this consistent inspection of utmost importance. Where professional golfers have caddies to do this for them, we amateur players must do this step ourselves.
After making your swing, give your dirty golf clubs a quick wipe with the towel you should have attached to your golf bag. Like some of the options on our list of the best golf towels of the year, a wet towel can make this step more straightforward, but it isn’t a requirement or necessity by any means.
Next, use a club cleaning brush (also hopefully attached to your bag) to get in those hard-to-reach areas where the initial wipe with your golf towel didn’t clean. Use the brushes bristles or included ‘cleaning picks’ to ensure your grooves are fully debris-free and ready to make your next swing.
This work while playing might sound like a serious hassle to some, but if you’re spending your hard-earned money on quality clubs, lessons, range balls, clothes, rounds of golf, travel to and from the course(s)… Wouldn’t you want your clubs to perform to their greatest abilities?
We’ll expand on why clean golf clubs and grooves are so critically important later…
Cleaning Golf Clubs After a Round
No matter how much attention you pay to clean your golf clubs during a round, there will be some instances where it’s impossible to keep every club head absolutely spotless.
Let’s say you’re just finishing a round as the Sun is setting, and it’s time for a celebratory drink at the clubhouse, or it may have begun to rain as you were finishing up and your clubs were too muddy to fully clean while playing.
Regardless of the situation, once you made it home and took a look at the state of your clubs, you realized it was time for an in-depth cleaning session.
These are the necessary steps involved in creating your very own “Golf Club Cleaning Kit” and what it takes to clean your golf clubs at home with as minimal stress and clean up as possible.
What You'll Need For Your Very Own "GOLF CLUB CLEANING KIT":
Sink, Bathtub, or 1-2 Buckets for Rinsing
Cleaning Solution (Dishwashing Liquid like “Dawn,” or “Simple Green” Concentrated Cleaner)
Access to Warm Water
Old Toothbrush, Club Cleaning Brush, or Soft Bristle Brush of Some Kind
Cleaning Sponge or “Magic Eraser” for Tough Stains and Gentler Cleaning
Preferably More than One Dry Cloth or Towel for the Drying Process
Cleaning Clubs at Home: How to Create Club Cleaning Solution
I have two preferred methods for creating my cleaning solution when I clean my golf clubs.
I’ll begin by filling up the sink basin or my small cleaning bucket with hot water and then sparingly adding either a few drops of dishwashing liquid, mild soap, or the ‘Simple Green’ cleaning solutions we mentioned earlier to our warm water base.
We emphasize the point of sparingly using either of the mentioned cleaning solutions because while those options we love to use produces the best results, they also include degreasing agents designed to remove grease, oil, and other contaminants from dirty surfaces in their ingredient lists.
Prolonged exposure to these cleaning solutions or using too strong of a mixture in your cleaning solution can result in possible damage to the epoxy holding the club head together or potential paint removal to the club heads themselves. We discourage soaking your club heads for too extended of periods of time.
How to Clean Wedges and Irons
Now that you’ve developed your cleaning solution and gathered your “Golf Club Cleaning Kit,” you’re ready to begin cleaning your golf clubs at home.
Steps to Cleaning Your Wedges and Irons
Begin by submerging your dirty clubs in the cleaning solution or soapy water for their initial “pre-soak.” (This allows all the mud and other debris to loosen from the club head and face for easier removal.)

2. Next, use your old toothbrush or cleaning brush of some kind with plastic bristles to remove the remaining dirt from the club’s cracks and crevices that are easily filled while playing.
3. Once your clubs have been scrubbed sufficiently, give the head a rinse in clean water to remove any remaining cleaning solution or debris, and immediately begin drying your clubs using your towel(s).
Since players’ golf bags usually consist of at least a few wedges and anywhere from 5-7+ irons, this is the part of the golf bag that generally takes the longest.
After you’ve finished all your wedges and irons, you’re ready to move on to the next step.
How to Clean Hybrids, Fairway Woods, and Driver
Added Tools: Cleaning Sponge or “Magic Eraser”
Hybrids, Fairway Woods, Drivers, and any other club heads not made of primarily more rigid steel-like irons will require more delicate care when cleaning.
Clubs in this “metal woods” category are also used more often for tee shots, meaning on top of being dirty like every other club, these may also feature colored streaks from golf tees scraping against their surfaces.
Additionally, modern clubs in these categories feature more adjustability features than ever before, creating even more areas requiring routine cleaning to perform as well as they possibly can.

Steps to Cleaning Your Hybrids, Fairway Woods, and Drivers
With your now created “Club Cleaning Kit,” begin by submerging your club head in your cleaning solution or soapy water for its initial soak.
Use your soft bristle brush on the face and underside of the club head but never use it on the top side of the club (the side that faces players at setup and address). Club heads in the “wood” category are often painted with paint that is highly prone to scratching or chipping if the wrong tools are used.
If any mud or debris is on the top of your club head, use a sponge to gently remove it without causing damage to your club’s paint or exterior.
Inspect your club heads once more for any remaining dirt left in any crevices, and use your soft sponge to remove it along with any colored tee marks remaining.
Rinse your club head with clean water, and immediately dry it with your towel as much as possible.
Now that you’ve finished this portion of your golf bag, it’s time to move on to the final step of what should be your regular and post-round club cleaning every time they’re moderately dirty.
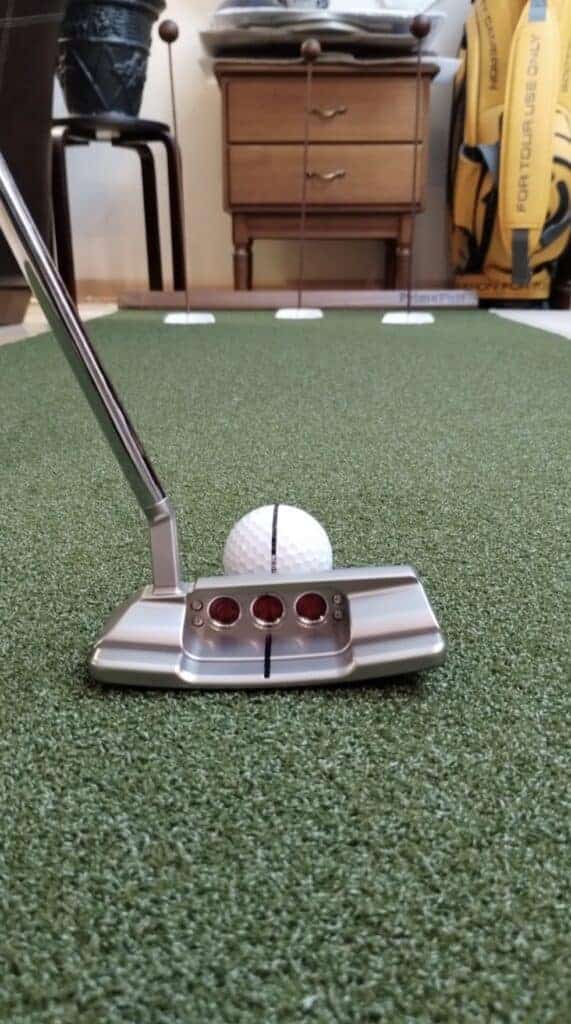
How to Clean Your Putter
If you’re a self-respecting player who takes care of the golf courses they frequent, your putter head is likely getting dirty from tamping and repairing so many ball marks on the greens.
Putter heads are often the most intricately designed club players own, with more weight ports and potential for hard-to-reach areas being inherent to their designs. Putters are also often made from softer metals that are easier to damage than most other clubs in players’ bags, meaning the most gentle care should be taken in this step.
Steps to Cleaning Your Putter
Begin by dunking your putter head in WATER ALONE. Putters often feature colored finishes on top of their metal surfaces that are most susceptible to corrosion or rust buildup if exposed to prolonged moisture or harsher cleaning agents.
Once your club head is thoroughly soaked, take a toothpick, soft sponge, or extremely soft bristle brush to gently remove dirt and sand from the tight spaces it tends to build up.
Repeat the process as many times as necessary until your club head is fully clean, and immediately begin to dry it to prevent rust from starting.
Additionally, if you’re looking to preserve the finish of your putter even further, follow these steps from Scotty Cameron (Creator and Owner of Scotty Cameron Putter Company).
” – Always dry your putter after play with a soft cloth.
– Then, wipe your putter with a Metal Care Cloth (microfiber).
– Always store your putter in a dry headcover, but a thin layer of oil on the putter head will enhance protection.
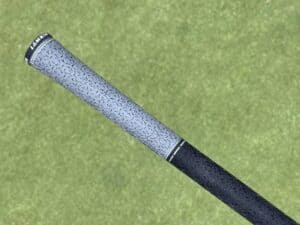
FINAL STEP: Clean Golf Club Grips (The Unsung Hero of Lower Scores)
Added Tools: Hard Bristle Brush or Hard Sponge, Thick Absorbent Towel
Cleaning your golf club’s grips isn’t a step that needs to be done following the completion of every round. Still, routinely doing it a few times a season will prolong the lifespan of your grips and help players develop consistent grip pressure (an often unrecognized element in better scoring).
An added tip: We’ve found it best to clean golf clubs’ grips in the bathtub or a deeper sink to make the most minor mess. The more rigid cleaning tools required to effectively clean grips will splatter dirt, grime, and hand sweat or sun-screen everywhere while in action.
Steps to Cleaning Golf Grips
Begin by rinsing your grip in clean water.
Spray your grip with your cleaning solution or dip your brush or sponge into your cleaning solution.
Vigorously scrub your grips and watch the dark nastiness wash away.
Give your grips an additional rinse in clean water, and follow that with a rough drying with your thick towel. After thoroughly towel drying, leave your clubs to finish drying in an adequate temperature room and allow any remaining moisture to escape the surface of the grip before placing them back in your golf bag.
Secret Grip Restoring Tip!
Grips are expensive and time-consuming to replace or have replaced by a professional. If you have a grip on its last legs but want to prolong its inevitable death, take some sandpaper and gently rough up its exterior before giving it an additional cleaning. This will add some “tackiness” back to the grips’ rubber exterior and provide a better feeling compared to worn grips!
Most Frequently Asked Questions about Golf Club Cleaning:
Many players know they should keep their clubs clean but aren’t aware of all the ways they are harming their performance by not doing it.
To begin, the golf ball needs clean grooves to develop spin. According to a study completed by Frogger Performance Golf Gear, dirty grooves and club faces result in roughly half or even less spin compared to what a clean golf club’s spin rate will be.
Additionally, the golf balls’ flight and launch angle become far less predictable, giving players two new ways to have a more challenging time hitting their target and intended yardages.
Debris-filled club faces can shorten the lifespan of your golf balls and even potentially damage your club face’s consistency by being chipped or deeply scratched.
How Often Should You Clean Your Club Heads and Grooves?
Developing your own “club cleaning routine” is one of the many marks of a “serious player” or avid golfer.
If you are regular about cleaning your clubs after each swing is made with your towel and brush attached to your golf bag, you should only feel the need to clean your golf clubs if they look exceptionally dirty.
For example, I try to play and/or practice at least 3 days a week. I’ll generally deeply clean my club heads and grooves once per week at this rate of play, relying on my post-shot maintenance to carry me between these cleaning sessions.

How Often Should You Clean Your Grips?
The answer to this question depends entirely on how often you play and practice.
If your clubs are seeing multiple rounds and practice sessions per month, or an average of around 10 or more trips to the golf course/range per month, your grips should likely see bi-monthly care.
Another issue with getting your drips dirty is having to think about keeping them clean while playing. Rotating gloves or laying clubs on the ground while keeping the grip elevated by a tee or headcover are great ways to reduce how fast grips get dirty and lose their tacky feeling.
We’ve found that by cleaning our grips every other month, they maintain a relatively consistent level of tackiness for their lifespan so we, as golfers, can grip the club the same way every time (eliminating a variable to the swing).
Can I Damage My Clubs By Cleaning Them Somehow?
There are only a few ways to actually “damage” a golf club by cleaning it. We’ve already discussed that we do not soak our golf clubs for extended periods of time in even plain water, and we would never do this with too harsh of cleaning agents mixed in.
Too strong of cleaning chemicals can damage the chrome plating on golf clubs or can even cause a rust spot if exposed for too long of an amount of time.
We made sure to emphasize using soft bristle brushes for the necessary cleaning steps because using too hard of bristles or God forbid a metal bristled brush (I can barely type it without cringing) will harm or even destroy your club heads finish, appearance, and performance.
What is the Best Type of Cleaning Brush for Golf Clubs?
If you don’t happen to live nearby a major golf supply store with tons of cleaning brush options, don’t fret!
For our reader’s convenience, we’ve released a “Best Golf Club Cleaning Brush” Buyer’s Guide to help you find the best options from every retailer in the club cleaning accessory space.
If you don’t like the idea of having to purchase specialty cleaning brushes, please ensure that whatever brush you use has soft bristles.
How to Properly Store Clubs After Cleaning and Between Uses
While we’re on the topic of proper golf club maintenance and care, it only makes sense to include the proper guidelines on golf club storage.
As we’ve encouraged readers in other articles, it is unwise to keep your golf clubs in the trunk of your vehicle. Trunks get extremely hot or cold depending on where the car is located, and this exposure to drastically different temperatures is where real damage to clubs can occur.
The epoxy and other bonding products used to construct club heads can become compromised, damaged, or brittle from these temperature changes, meaning inside and stable “room temperatures” are where your golf bag should live when it isn’t at the golf course.
Can I Fix a Scratched Club Head?
If you notice a small scratch develop on one of your club heads, we’ve got an old trick to removing said scratch that actually involves toothpaste!
After you’ve thoroughly cleaned your club’s surface, you can take a damp microfiber cloth and work a small amount of toothpaste in gentle circles around the damaged area.
The minor grit in toothpaste combined with the circular motion you’re making helps essentially buff out those scratches and restore your club head’s shine at the same time!
We’ve attached a detailed video explaining the toothpaste cleaning process below.
Final Thoughts on Keeping Our Golf Clubs Clean
While cleaning your clubs should be a process you take seriously, it doesn’t have to be something you dread. With the steps we’ve outlined above, readers should be able to properly care for their clubs to the best of their abilities and get the most out of where they are investing their money.
If you’re anything like us, after a while of continually doing your club cleaning routine, you’ll begin to cherish the 15 minutes of completing the ritual.
We personally use the time spent scrubbing and using elbow grease as a moment to reflect on our recent progress within our game, recap old rounds, listen to music, or focus on upcoming goals for the season.
About The Author
Writers of Independent Golf Reviews
Independent Golf Reviews has tested and reviewed 1000+ golf products over the past 10 years. We use our experience and expertise to give golfers an unbiased insight on the market.
Read more…
Share
Receive the best golf discounts available exclusively for our subscribers and be auto entered into our monthly golf giveaways!
Success!⛳️
You are now an official member of IGR. Keep an eye out for the perks.
No spam, ever. 🔒